Installing a FortiAnalyzer in Proxmox
Migration of FortiAnalzer
I recently came to the conclusion that I need a more permanent Lab setup and as such I need to migrate my FortiAnalyzer to my Proxmox VE lab. Proxmox PVE is a KVM/QEMU based hypervisor, and Fortinet supports KVM virtualization with their FortiAnalyzer images, so this is a reasonably straightforward execution. I currently run a FortiManager as an Analyzer, but I am going to split my Manager and Analyzer as part of this migration. The FortiAnalyzer and the FortiManager share a lot of the same code-base so we can use the same process to deploy both virtual appliances.
Download the KVM images
The first thing you have to do is download your KVM images for your virtual machine from the Fortinet support site. You can get the image from the “virtual machines” download link, but I always go to the firmwares list out of habit.
- Go to the Fortinet support site. Login with your fortinet support account. If you dont have one (and you have a valid Fortinet support subscription/supported device) you can register for one.
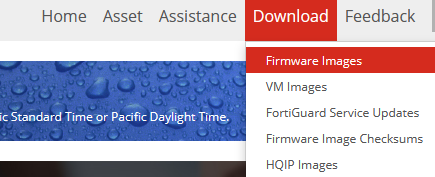
- In the top Menu/Nav bar go to Download > Firmware Images.
- From the drop down menu, select FortiAnalyzer (or Fortimanager ) and then naviate to the appropriate version that you wish to deploy. I will be deploying 6.4.2.
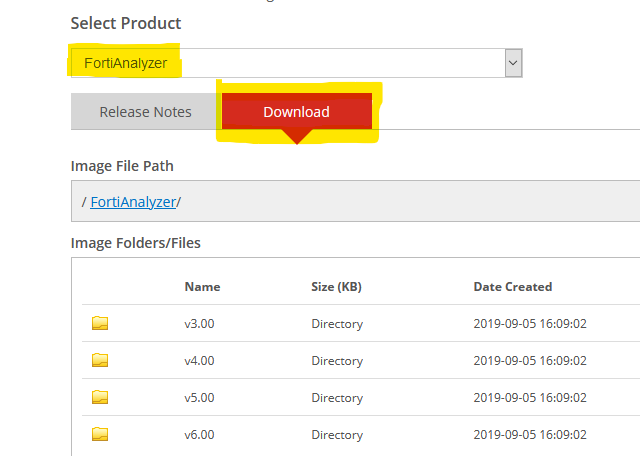
- For deploying in Proxmox (Or Nutanix AHV, the other KVM hypervisor platform I work with regularly) you will want the version with KVM in the title, that ends with .zip. The .out file is the firmware version without the disk images. That is what you would use if you already had a VM and wished to upgrade it to a new version.
Deploying the VM
I modelled my deployment based on the KVM deployment information available on the docs.fortinet.com website.
Create our VM
First thing we have to do is create a VM for us to attach our FAZ OS disks to.
- Click your
Create VMbutton in the top right of your PVE dashboard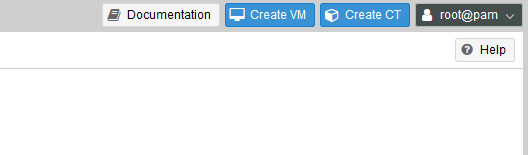
- General Tab Assign your VM a unique VM id and Name. I always name my VM with the version that I used to originally deploy it (6.4.2) so I know in the future how old this VM is. Hit
next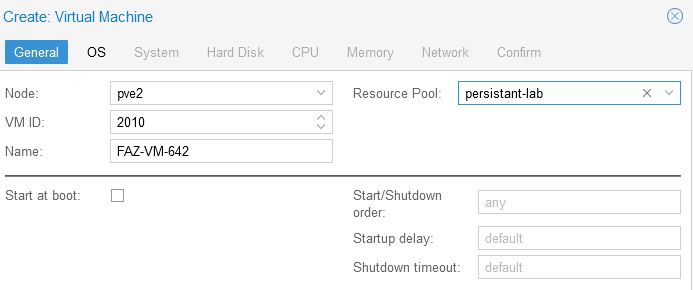
- OS Tab We are actually not going to add a disk at this time, so select
Do not use any media. For the OS Selection, selectType: LinuxandVersion: 5.x - 2.6 Kernel. Hitnext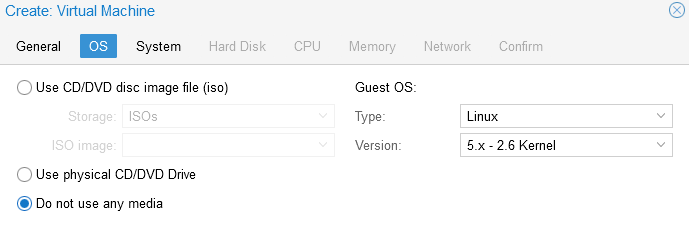
- System Tab We are going to enable Qemu Agent since the KVM OS disks have been preinstalled with
qemu-guest-agent. Leave everything else on this page as default (i440fx machine type, defult graphic card). Hitnext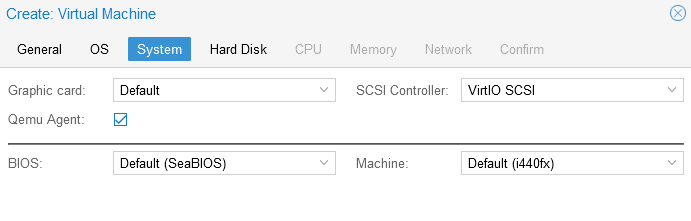
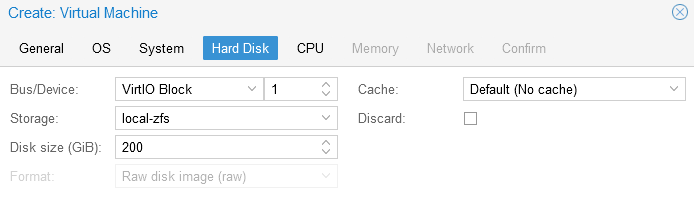
- Hard Disk Tab We are going to create a new VirtIO block device, on bus/device #1. I added a 200GB HDD, which should be plenty. We are going to use Bus0 to mount the QCOW2 image that downloaded in the “Download the KVM images” section above.
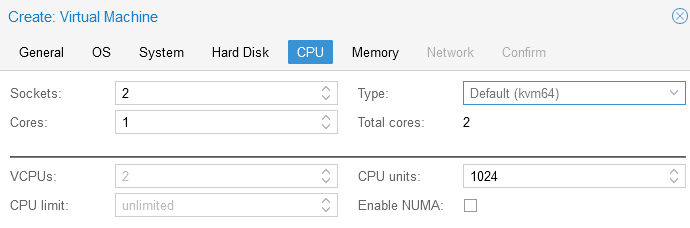
- CPU Tab keeping this simple I am just going to deploy with 2 Sockets with 1 core each for the FortiAnalyzer. I only have a couple of small fortigates to collect data for and I am currently collecting <10 logs/second
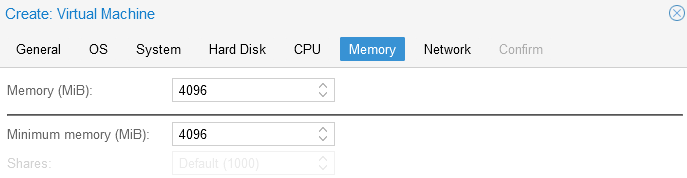
- Memory Tab again since I am not really doing anything ultra high performance here, I’m just going to assign 4GB of RAM
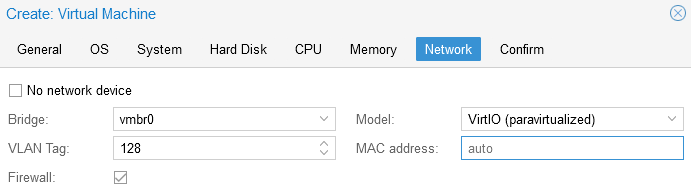
- Network Tab My Proxmox hosts are configured with openvswitch bridges (for other reasons) so I need to tag my VLAN ID on the virtual machine interface. For now I am going to create 1 NIC for the management VLAN and we can add additional NICs later. Use VirtIO network interface model.
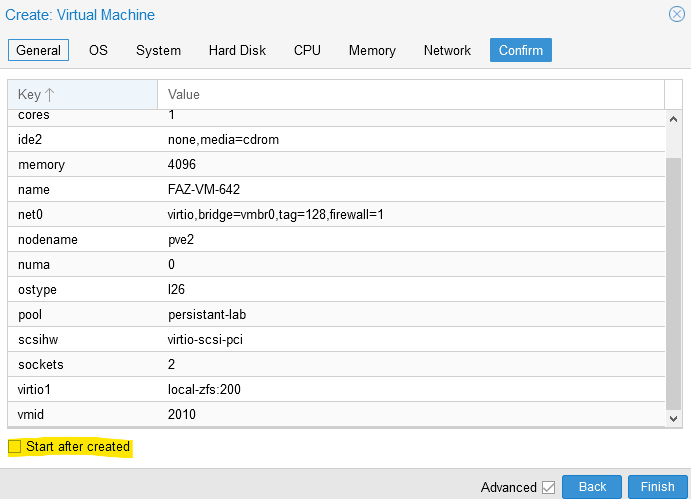
When you have your configuration built, hit the Finish button on the confirm page, make sure you do NOT have the Start after created button checked since we still need to mount the OS drive and add some NICs
Adjusting VM before boot
We still need to add our OS drive that we downloaded earlier.
- Unzip the kvm.zip files downloaded from the fortinet support site
- SCP the unzipped qcow2 files (for faz should be faz.qcow2, for fmg should be fmg.qcow2) to your proxmox host with
scp FMG_VM64_KVM-v6-build2122-FORTINET.out.kvm.zip root@<proxmoxhost>:~/. in this commandcan be replaced with your ip address of your PVE host - Find the proxmox vm id of the VM you created. In the WebUI it is the VM number that identifies the specific VM. In my example my FAZ is 2010
- On your proxmox server create a VM specific image folder in /var/lib/vz/images/[VMID]. eg.
mkdir /var/lib/vz/images/2010 - Move your OS disk (faz.qcow2) to this folder.
mv ~/faz.qcow2 /var/lib/vz/images/2010 - on your PVE host run
qm rescan. This forces proxmox to rescan its regular data directories for disk images. if you have a LARGE proxmox installation and you want to avoid the rescanning of all directories, you can rescan directories meant for your specific VM using the-vmidswitch (eg.qm rescan -vmid 2010). You should get something like the following output:root@pve1:/var/lib/vz/images/2011# qm rescan rescan volumes... VM 2010 add unreferenced volume 'local:2010/faz.qcow2' as 'unused0' to config root@pve1:/var/lib/vz/images/2010# - Now go back to your VM’s hardware page. You should now see an Unused Disk 0 entry disk.

- Edit this disk and select VirtIO Block and 0 as your Bus and Device.

- You also MUST edit your boot order to reflect this new change, otherwise your VM is going to try and boot off your empty log disk. You can edit this on the VM options page, select boot order and click the edit button.
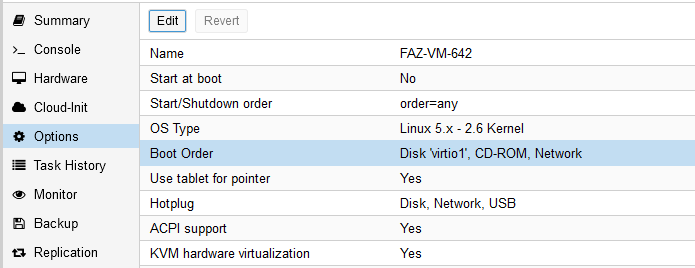 I set my boot order to Disk ‘virtio0’, none, none
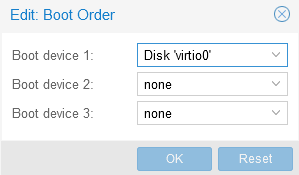
Boot it!
Its about time, lets boot this thing!
Power up your VM and open your VM Console. If you followed my instructions above the NoVNC console should work for you flawlessly. This is generally enough considering you shouldnt really be hanging out in this console anyways, its kind of useless except for basic config to start anyways, however in my extremely LIMITED testing the SPICE console should work as well. Either way you should be greeted with a whole bunch of …’s, you are notified your Serial number is FAZ-VM0000000001 (Trial licenses always have this serial, its good for 14 days) and the VM is going to format the hard drives. Once your drives are formatted you can begin basic VM setup
- Login with the default username admin and password (blank). You will have to set a new password.
- Set Port1’s ip address
config system interface edit port1 set ip <ip address/cidr> set allowaccess https ping ssh next end - Set your DNS server. If you have an internal DNS server, I recommend using that instead of cloudflare’s DNS as I did in the below example, that way you get reverse resolution for your internal systems and hostnames
config system dns set primary 1.1.1.1 set secondary 1.0.0.1 - Set your default gateway
config system route
edit 0
set device port1
set gateway <your default gateway>
set dst 0.0.0.0/0
next
end
If you are going to license your VM, this is the time to do it.
If you dont have a FAZ license, following this walkthrough to this point has given you a FAZ VM that is good for 14 days, but on the latest versions you have to authenticate with your FortiCloud ID to be able to register the trial.
Licensing on Proxmox PVE is no different than in VMware or any other hypervisor so you can follow the license guide. The IP address assigned to your license in your support account needs to match the IP address assigned to port1 in your VM.
Matt
Security Architect and TechnoHobbiest
My professional interests include information security, free and open-source technologies, and cloud services.